Connect and Verify 1and1 Domain with Blogger
Have you got a 1and1 domain?
Are you trying to Domain set up it with a Blogger.com blog.
Don't worry we are here to help you for how to point your 1and1.com domain to BlogSpot blog. Generally, with GoDaddy, Namecheap and BigRock it is very easy to point a domain to BlogSpot website. But when it comes to 1and1 it is not that easy.
It is a little bit quirky to verify your 1and1 domain ownership to use for your BlogSpot website. The problem is that, in 1and1 domain settings, you can’t add a CNAME direct to your domain DNS. To do so, you need to create first a subdomain and then you will be allowed to add a CNAME record to that.
How to Setup Custom Domain on Blogger with Godaddy
اردو میں پڑھنے اور مزید معلومات کے لیے فری سبسکرائیب کریں۔
Subscribe us and Get updates in your email box
Step by step guide for how to verify and point your 1and1 domain to BlogSpot website
1. First of all get access to your blogger.com account and then go to the blog you want to set up with 1and1 domain
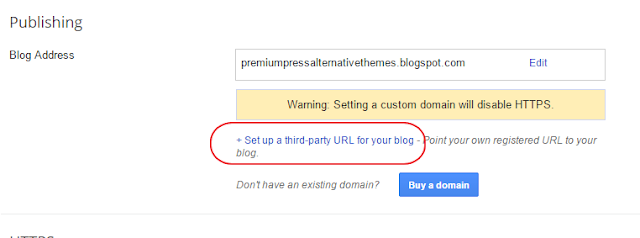
2. Go to settings of that blog > Publishing settings > Setup a 3rd party URL for your blog.
3. On choosing that option, when you try to save settings, Blogger will ask you to point that domain to your blog and verify domain ownership. Keep this page in that condition
4. Now open a new Browser window or tab and log in to your 1and1.com account > Manage Domains
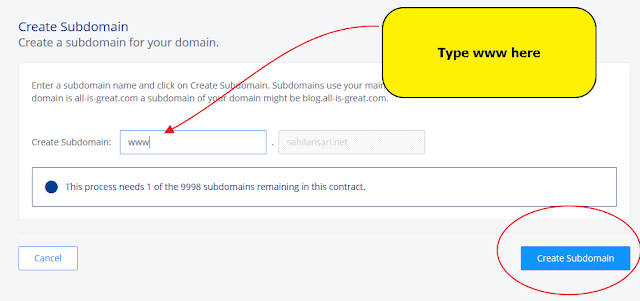
5. Create a new subdomain with www
6. After creating subdomain edit subdomain DNS and add CNAME record ghs.google.com
7. Now copy the text from Blogger screen (as shown in image) and create a new sub-domain with this copied text.
8. Now above copied code paste in bellow step. and press create subdomain
Now wait for a few minutes and then try saving settings on Blogger screen. You domain should be verified. If not, try saving settings after sometime as sometime it may take longer DNS settings to be effective.
Tip – Don’t forget to add a redirection rule yourdomain.com to www.yourdomain.com to avoid 404 error on your naked domain (replace Yellow text with your own domain name).
1. First of all get access to your blogger.com account and then go to the blog you want to set up with 1and1 domain
2. Go to settings of that blog > Publishing settings > Setup a 3rd party URL for your blog.
 |
| Blogger Redirect Setting |
4. Now open a new Browser window or tab and log in to your 1and1.com account > Manage Domains
5. Create a new subdomain with www
6. After creating subdomain edit subdomain DNS and add CNAME record ghs.google.com
7. Now copy the text from Blogger screen (as shown in image) and create a new sub-domain with this copied text.
8. Now above copied code paste in bellow step. and press create subdomain
Now wait for a few minutes and then try saving settings on Blogger screen. You domain should be verified. If not, try saving settings after sometime as sometime it may take longer DNS settings to be effective.
Tip – Don’t forget to add a redirection rule yourdomain.com to www.yourdomain.com to avoid 404 error on your naked domain (replace Yellow text with your own domain name).


Very helpfull Post for technology
ReplyDelete